Friday, February 20, 2009
Calling for Reader input
Oh, please! I so did NOT make this bowl.
So, I've talked about the steps in making a pottery piece, but what about after all that throwing, praying to the Pottery God, trimming and sanding? Well, kind readers, that's where even more fun awaits! After we make the pieces, they are allowed to dry (completely-key term here). Then, they go through three more critical steps:
1. A low-firing (only to about 1400 or 1500, I believe)
2. Coloring/glazing
3. Final high-firing (hotter than you want to know)
Right now, I've got a bunch (like a whole kiln shelf worth) of pieces being low-fired. That means those pieces will be ready to glaze/color/decorate next week. So, my homework assignment to you: Take a look at your pottery at home and share with me information about your favorite pieces, their color, etc.
I welcome the suggestions. Just remember to keep it simple. I'm not that advanced when it comes to glazing. I say that yet I ordered Sample Set #3 of glazes from Coyote Clay and Color. My pottery teacher ordered a different sample set earlier this month. She did a trial run this week and I was there yesterday when she took pieces out of the kiln. Some were gorgeous and some combos . . . . not so great. I did take notes on what combos I liked and what to avoid. I think many of us (OK, me, mainly, but I'm the one making the stuff, right?) are going to like Archie's Base, Crazed Copper and the Light Shino.
Wednesday, February 18, 2009
The Little Pot That Could (and did)
This poor bowl. I swear; it has more luck than a cow in India. It was one of the first pieces I threw that was worth keeping. It is a little thick, so it took forever to dry to a leathery consistency (what you're looking for when you want to trim a pot). In one of my "gotta-get-it-done-yesterday" moments, I had the bright idea of setting it in front of the wall heater in the pottery studio. The Pottery God on duty was not pleased with my 'hurry up' attitude. I came back about a hour later to find it drying well . . . . but a hook from the wall had fallen off and landed in the bowl, cutting the rim.
I cried, I nashed my teeth, I shook my fist at the sky, screaming, "Why, Pottery God, why?" Alright. I really didn't do any of that. I made a sharp expletive and told the other two students in the room that my pot was ruined. One women looked at it and said, "Why not put a cut in the other side to make it look intentional?" Boy, did that blow all the hot air out of my sail; to be replaced with the cool breeze of salvation (as in, the pot could be salvaged).
So, took her advice and put another cut into the rim. Later, when trimming, I couldn't get the bottom straight. I cut and it wobbled; I cut more and it wobbled; I cut more and the pot asked to be put in a Dali painting. Finally, I got something that was half-way straight.
So, last Saturday, when it was time to glaze, I figured this was the pot to experiment on. Because, if any of my pots would survive an experiment, this would be the one. Was I right or what?!?! I dipped it in a brown glaze and then partially dipped it in a seaweed colored glaze. Now, we had been told that the seaweed glaze was giving our teacher, and her husband, who mixes the glazes, fits because of its viscosity. So, use with caution. I gleefully put it on this pot.
This glaze does have some 'issues' that teacher and her husband are working on. The viscosity causes the glaze to 'pool' at the bottom (instead of just drip off). I have the dried drop of glaze on another side of this pot to show for that. I could sand it off, but I think it gives this pot character (you can see this same effect on another pot that I posted yesterday) and is just another chapter to The Little Pot That Could.
Tuesday, February 17, 2009
Monday, February 16, 2009
Hip to be square
So, I got tired of making bowls. Bowls, bowls, bowls. Yes, I understand that practice is good. Yes, the practice has improved my technique, speed and success rate, but after so many bowls, I needed something different. Yet, I was having the type of day where I wanted to have a high likelihood of a successful throw. What's a tangible-product-oriented girl to do? Make her own squared off bowls!
It is sooooo hip to be square! OK, I have to admit. I did not come up with this on my own. I saw it in a pottery book I checked out from our local library. So, I gave it a whirl and produced two small-ish square bowls. Feeling pretty cocky from that successful experiment, I tried my hand at something else . . . . Throwing plates using the 'correct' technique (versus the clay-is-to-weak-to-go-up-in-a-cylinder-might-as-well-push-the-walls-flat-and-make-a-plate mistakes of the past couple of weeks). Potter's note: It ain't as easy as it looks. I ruined two good lumps of clay by making my bottom too thin.
Well, as the above picture demonstrates, it was a freaking home run experiment! By the end of my pottery session I had two small plates (one saucer and one salad plate size) and two mid-size (small dinner size) plates.
P.S. I had my 'glazing' lesson this past Saturday. Hope to have pictures of a few 'finished' products later this week!
Friday, February 13, 2009
Inspiration
Wednesday and Thursday were not good pottery-making days. The wheel was not my friend. However, I took a different approach today. I got back to the basics. Starting small, keeping it simple and practice, practice, practice. Much better day today. Although I had a great 'technical' day, I was lacking in artistic inspiration. Well, when you need some inspiration, why not look to some of the best artists in life? God and Mother Nature.
Now, you'll have to excuse me. A sunny day, warm dock and a decent book are calling my name.
Wednesday, February 11, 2009
Word-y Wednesday-Pottery Style
Y'all tired of this yet? Eventually, I'm gonna have to stop or else everyone will know what they're getting for Christmas.
Here's the deal: When you get to this stage of pottery making (meaning you have a viable piece), you hesitate to expand your horizons. You just want to offer a 'thanks' to the pottery gods, fire the damn thing, glaze it and fire again. Let's be honest, there are a lot more steps where you can mess up a piece. Why (possibly) knowingly mess it up at this stage? Outside of the pottery studio, I have a tendency to stick with routine; be a bit adverse to change (duh!). Why? Well, we all know that some trials can lead to errors (gross errors). Today, trying to break that pattern of sameness (or should I say, 'perceived safety'?), I decided to experiment on the previously mentioned ugly pitcher. Let's see how it looks when I try to etch a design into the mildly damp clay . . . . .
Ta-freaking-da! Not too shabby right? This experiment led me to try this etching thing into a piece I was fond of, a small plate.
They're fish, but hopefully you could tell that. I've never been a good artist. I can visualize something in the gray matter between my ears, but the vision loses potency traveling from brain to hand. So, you have to understand this was a big feat for me. Now, there is the chance that this detail could be lost in the firing or glazing process. That's OK. I'll consider it part of the lessons learned to make future pieces even better!
Tuesday, February 10, 2009
Bowls, Plates and Starfish?
Quick lesson in the steps of 'how to throw pottery on a wheel'
1. Knead a lump of clay and throw on a wheel
2. Offer up a prayer to the pottery gods
3. Center clay (this involves copious amounts of physical strength, hand coordination and cussing)
4. Shape clay (usually, potters have a shape in mind; I just let the clay 'speak' to me) (involves even more cussing than step 3, wailing and cursing/praising of the pottery gods)
4a. Depending on outcome of Step 4-Feel like a failure or pottery's equivalent of 'Who's Your Daddy!'
5. Let clay dry to the consistency of cheddar cheese
6. Trim form (yes, this to can involve cursing, especially if you ruin a piece)
7. Sand form (yup, cussed during this step yesterday when I broke a pot)
8. Allow form to dry completely
9. Low fire in a kiln
10. Glaze
11. High fire in a kiln
12. Result: Possibly usable piece (smack that, y'all!)
This Saturday is the sixth and final lesson in my introduction to pottery wheel class. By Thursday afternoon, we, the students, have to have our items prepared and ready to go into the low fire kiln before we get our lesson in glazing. Now remember, firing and glazing of three pieces is included in the cost of the class. How many pieces do I have? Waaayyyyy more than three. How many pieces am I going to fire and glaze? Not quite as many as I've made.
And the crazy thing is that I'm continuing to throw in hopes of eeking out two or three (or five) more pieces. For example, see the plate below? I threw that yesterday.
Now see the plate? Looks like it spent a little too much time on the ocean floor. Not quite. Note: This is not something we've learned to do in class. I was in a creative mood. So, I took some leftover clay, from a pot that went horribly wrong (bad, bad stroke, no saving it), and today, rolled it out, borrowed my teacher's cookie cutter and attached the clay 'cookies' to the plate. I used a similar fashion to how we were taught to attach handles. (By the way, suck at attaching handles. Did it on a short, squatty pitcher today and now the damn thing looks like it was completed by a kid who was trying to sculpt in the middle of a seizure. Yes, worse than the Salvador Dali bowls I've been making. Didn't even warrant a picture.)
Now, I'm not sure if I'm doing the whole process of attaching them to the plate correctly, but, if I do say so myself, it looks pretty neat. I'll keep you posted on whether it becomes an actual 'completed' project. If it does, it might just be one of the pieces DJ and I keep. Sorry, no starfish for you (but I do know a pitcher with a hand sculpted handle that might be looking for a home).
Blogger note: I just signed up for two more pottery classes. I'm taking another intro to wheel throwing (which is quite normal) and, in April, I'm taking a 5 lesson hand building class. Wow. This means I'm pretty much taking pottery classes from now til the first week of May. And, since I'm pretty much spending all our money that would go to presents on these classes (and clay, glazing and firing costs), you will be getting pottery for birthdays, Christmases, etc, etc for years to come! This includes you DJ!
Sunday, February 8, 2009
It sounded like a good idea
Today's high in New Bern was predicted to be mid-70's. So, on our way home from the gym this morning:
Me: "What would you like to do today, Babe?"
DJ: "I was thinking either go for a walk or kayaking. Something outside so we can take advantage of the weather. Why?"
Me: "Well, I have an idea, but I'm not sure you're gonna go for it."
DJ: "Your idea?"
Me: "Why don't we pack lunch and go down to Fort Macon. Walk along the beach and have ourselves a little picnic by the ocean."
DJ: "I'm game."
At Fort Macon, two hours later (just after twelve noon):
Me: "What is the temperature here?"
DJ: "54 degrees."
Me: And what was it before we came over the bridge to Atlantic Beach?"
DJ: "64 degrees."
Folks, ten minutes later we were walking along the beach trying not to get blown across the sound and into Beaufort. When we turned the corner and hit the Atlantic Ocean side of Fort Macon, we had a feeling that we needed a tether (like the kites in the picture above). No way we were staying on this beach for lunch. No worries. Just 40 minutes of walking by the water, taking in the waves and watching the fishing activity was therapeutic to the soul.
From there, we did drive to Beaufort (where the wind wasn't Nor'easter force) and had lunch while looking at all the luxury yachts in the harbor (what do these people do for a living?). We did enjoy a short walk outside of the historic area, all the while keeping our eyes on Carrot Island for the wild ponies. Eventually, we saw about six or seven just grazing at the shore line.
Oh! And the high in New Bern today? 74 degrees. Almost 20 degrees higher than the high at Fort Macon. Gotta remember that water/ocean cools the surrounding area.
Friday, February 6, 2009
Trimming
Blogger note: Now remember, objects are larger than they are in real life.
So, I have shared with you some of my pieces after they've come off the wheel. Now, let me show you what they look like once they've been trimmed. Trimming is a process where you just clean up the shape and bottom. This is often times how bowls get the ring footed shape they seem to 'sit' on (like the ever so talked about spittoon below). It is really one piece of pottery, but just trimmed to make it look like a bowl on a foot (or ring).
Trimming also gives you the opportunity to change the shape of your bowl and allow you the chance to make the clay thickness more consistent throughout the bowl. If you take pottery, you'll notice that the bottoms are often thicker than the sides or tops. Quite common. However, this inconsistency in thickness can lead to problems, like cracking, uneven drying and a piece that could easily just burst in the kiln (thus ruining your piece and other pieces in the kiln). Not something you want to have happen when you've put such time and effort into a piece.
I've only got two more classes left and I still need to learn how to put on handles (no telling how many of you coffee, or cocoa, lovers will be getting mugs), sand, identify if a piece is ready for the first firing, glazing, etc, etc. So much to learn, so little time!
Wednesday, February 4, 2009
Wordless Wednesday-Pottery Style
Tuesday, February 3, 2009
It's not lopsided, it's 'hand made'
Warning: Objects in this blog are smaller than they appear (much smaller)
Yeah. This ain't your mass produced pottery. This is prime-grade, first time attempts from my pottery wheel class. Of course, this is the product after 4 lessons. I'd show you the product from that first lesson, but . . . that's right, I trashed what I was trying to make.
However, with some practice, practice and patience, I'm getting it. Not perfect. But, as our teacher says, it isn't supposed to be 'perfect;' it's hand made. Yeah. Great. I think she just tells us that to make us feel better.
This hobby has also reinforced the lesson that not every action has to have a tangible outcome. My first few times at the studio by myself ended up being two hours of 'attempts' and no final product. However, all those attempts ended up being lessons. Either the lesson of getting a feel for the clay, learning how to 'center' your clay, knowing when you've walls are too thin, and realizing that 'point' at which if you touch or try to mold it any further, you'd be doing more harm than good. Lessons aren't tangible, but nonetheless, they are valuable.
I threw some more pieces today, but one of them might be a dud. It came off the wheel looking beautiful. Shallow bowl, lovely shape, wide lip. However, after several minutes, I noticed one side of my lip starting to droop. Uh-oh! Can't wait to see what it looks like tomorrow. I'll just tell folks my pottery is influenced by Salvador Dali.
Monday, February 2, 2009
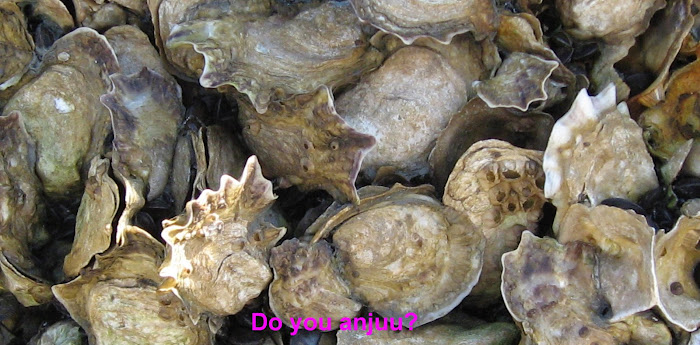
My life is about as exciting as this guy's
I got a gentle nudge (from a friend in PA) about my blogging or lack there of. I could list a number of reasons for my absence, but they might be interpreted as excuses. Nothing worth blogging about going on in my life, cold weather makes me irritable with the overwhelming desire to hibernate, had some freelance work assignments, traveled up to VA for a short visit, entertained the in-laws this past weekend and spending some of my free time at the pottery studio. Sound like excuses, right?
Yeah. I thought so too. I think the real reason is that we've been going through some 'changes' in our household. No, not 'the change' many women talk about, but just changes in schedules and environment. Unlike our stationary friend in the picture above, a human's life is filled with changes. Right now, that means that my best friend and playmate (i.e. my husband, DJ) isn't here as much. Big bummer to my psyche. I'm finding that my pattern of behavior (as most of you are already aware) is to withdraw when I'm feeling overwhelmed or in flux. However, we are starting to adjust (even Ginger) and that has led me to feel more . . . . hmm, can't find a good word. Settled, maybe?
So, last week was better than the first half of January and I expect this week to be even better (at least my pottery skills are improving). But, here is something to ponder, how do you react to and handle change?
Subscribe to:
Posts (Atom)